I have been using a very cheaply made lap steel that is available from several sources- you’ll see them on online music stores and eBay. The last two I bought were labeled “Rogue” and these came with screw on adjustable legs- I really like to have the legs as my first real non pedal steel was a 50’s Fender Stringmaster 8 string triple neck.
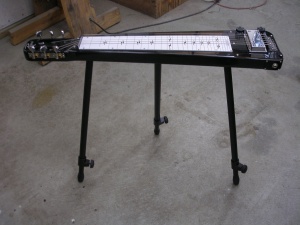
I got these from Musician’s Friend for around $80 each including a heavy duty soft shell case, the oldest one I have was labeled “Artisan” and it came with no legs but at any rate I extensively modified the guitars. The most important thing I did was I replaced the nut and bridge and I converted the guitars to a string through body like an old Telecaster. These cheap little lap steels make a useable rig if you take the time to set them up right and put a good pickup and electronics in them. If you can’t do this work yourself I suggest patronizing one of the many fine lap steel builders working in the USA today many of which offer my pickups as standard fare and are listed on my website. The quality of lap steels being made today by these small businesses can not be equaled or surpassed by these cheap import models and they often exceed the quality of the finest vintage instruments.
These lap steels originally come with a narrower spaced nut and bridge (the bridge is a standard guitar bridge which is too narrow). Wider string spacing makes bar slants and finger pickup much easier. For slanting the bar (a sort of advanced technique) wider string spacing makes it easier to play in tune and the wider string spacing makes it easier to bend strings behind the bar to get pedal steel type sounds.
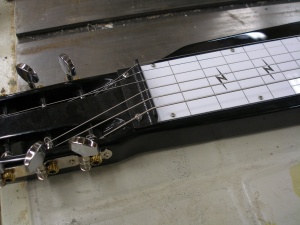
Look at the photos and you’ll see I just used some angle iron and I made a nut and bridge about 9/16″ tall. Typical lap steel string spread at the nut is about 1-31/32″ and at the bridge 2-3/16″ compared to on a guitar 1-5/8″ and 2-1/16″.
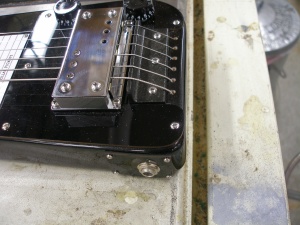
I painted the angle iron with black “Hammerite” which you can get at any paint store. The bridge and nut were 9/16″ tall, so the Supro® pickup needed a 1/8″ shim to be in proper alignment.
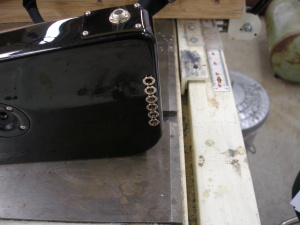
As you’ll see in this photo, I also modified the guitar by drilling holes all the way through the body and put string ferrules in the back.
I also relocated the output jack to the side of the guitar rather than where it was originally located in the pickgaurd. This required a hole to be drilled for the jack and a new jack plate needed to be made.
I also routed the pickup cavity out so I could mount a variety of pickups. This step is not necessary if you mount only the Supro®.
In this photo you can see I made a new pickgaurd out of plastic. This turned out to be much easier than working with the original metal pickgaurd.
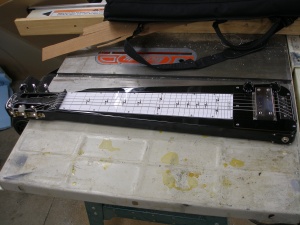
I also replaced the fingerboard. This was not a necessary step. But I have the tools to do it, so I went ahead and put some lipstick on the pig – so to speak.
The only snag was only two of the 4 mounting screws for the pickup actually bit into wood – the two mounting screws closest to the fingerboard are machine screws which I made two threaded holes in the pickgaurd for them to tighten up against because the screws were located over the route for the original pickup which was quite deep. The pickup is mounted plenty solid this way.
To learn more about the Lollar Supro® lap steel pickup, visit our web site.
Supro®, and the “Supro Lightning Bolt design” are registered trademarks of Zinky Electronics, LLC. Lollar Supro style pickups are a limited production, under license of Supro USA.